This cut makes everything look instantly fancy.

One of my favorite things to do in the evenings is to settle in and watch Food Network.
After making and writing about food all day, you’d think I’d be tired of it. But there’s something just so enthralling about the organized chaos that is a full-scale professional kitchen.
There’s one part that always takes the cake for me, though – that sends a little thrill through me every time I see it… and that’s the beautiful, flawless, deadly-fast knife skills.
So imagine my surprise when I eventually come to discover that doing a beautiful, perfect julienne cut is actually SUPER easy, even for home cooks!
Even the classic method of preparation was easier than anticipated, yet there’s an even faster shortcut method I have to show you as well. With it, the pieces don’t turn out quite as flawlessly uniform, but it’s super simple to do.
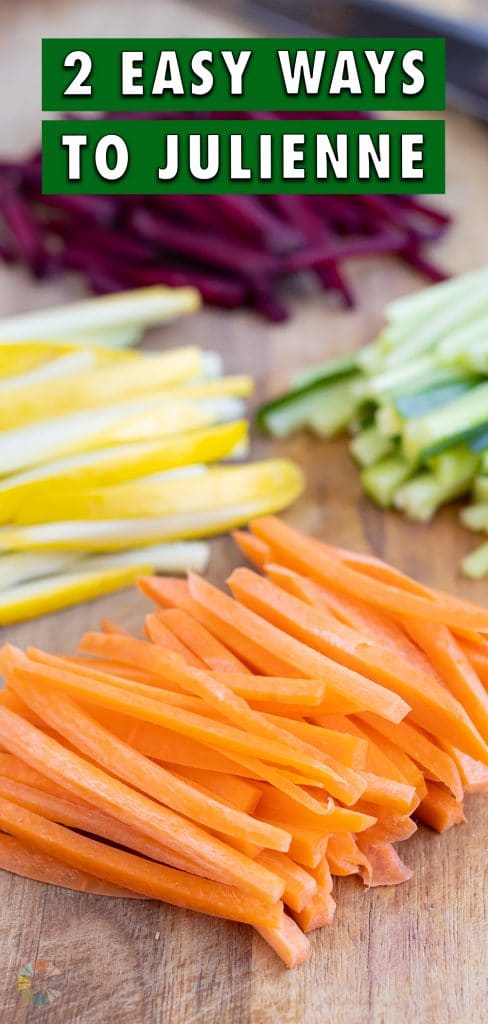
What is a Julienne Cut?
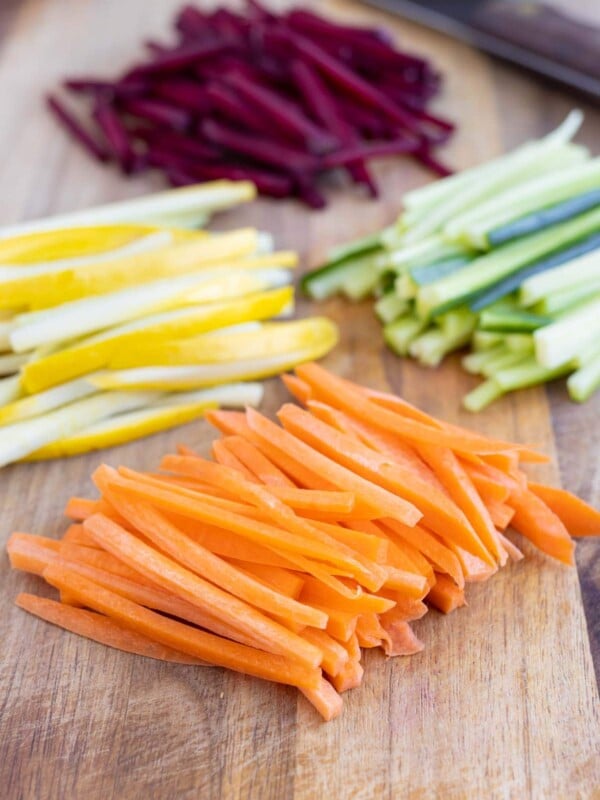
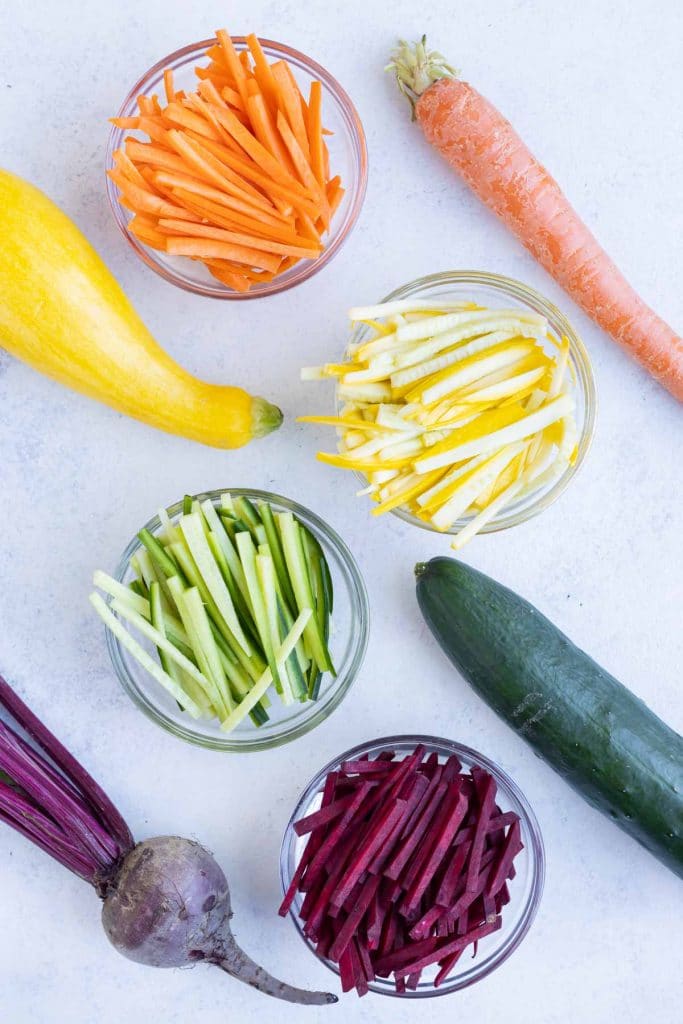
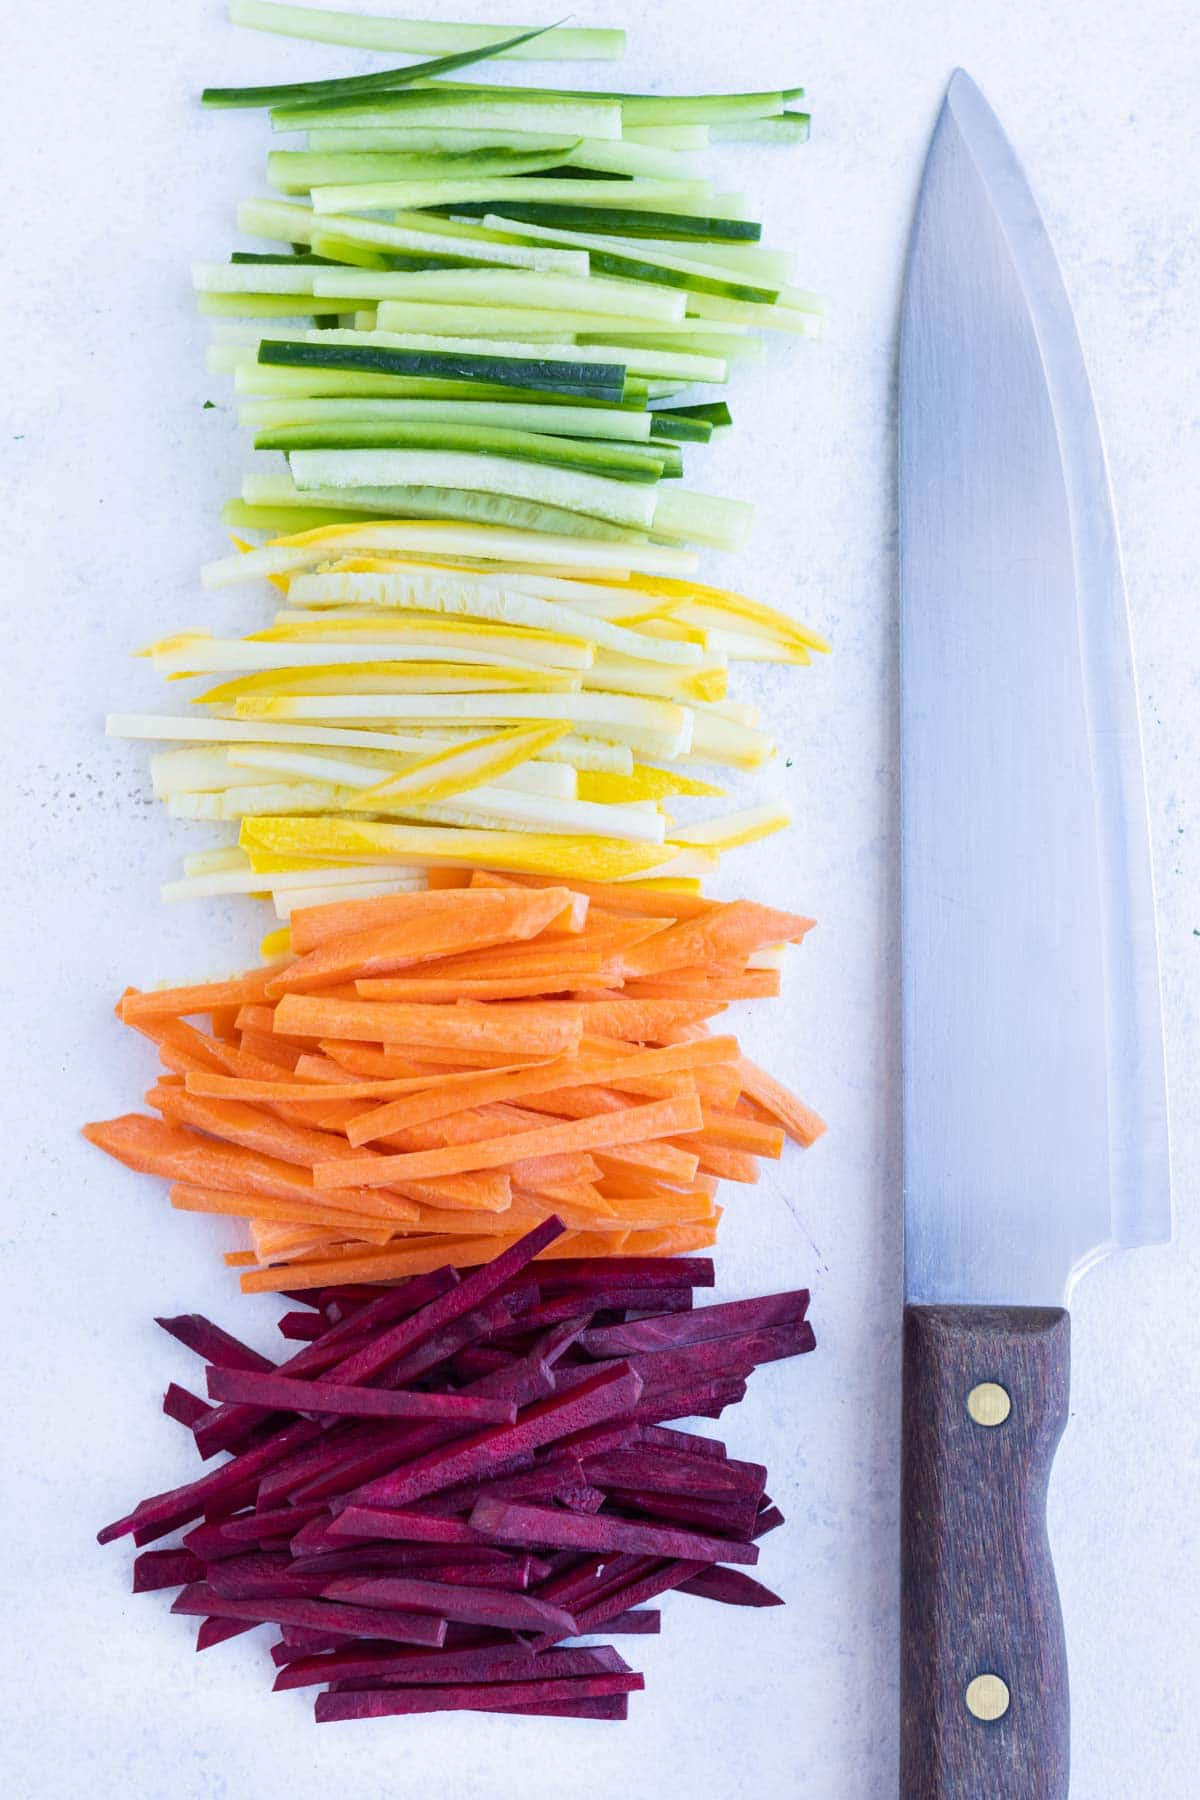
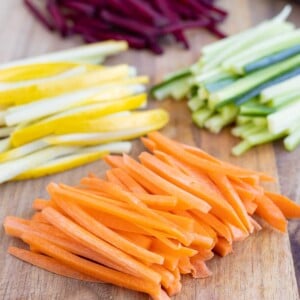
Julienne is a classic French method of chopping which yields 2-3 inches long and 1/16 to 1/8th inch wide matchstick-style pieces of fruit or vegetable.
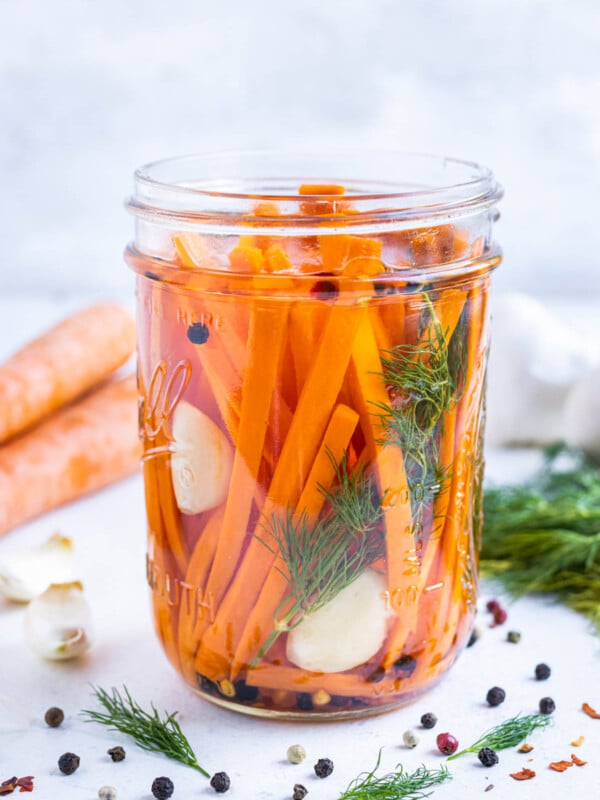
It’s perfect for making super slim, crunchy pieces of carrot, cucumber, or bell pepper for recipes like Vietnamese Fresh Spring Rolls, California Roll, or Beef and Broccoli Stir-Fry!

Ingredients and Substitutions
For the exact measurements and detailed instructions, please see the recipe card below.
- Julienne peeler. If you want to forego julienning with a knife, you can use one of these instead. The downside is that it makes pretty small pieces, and you lose most control over the size of them.
- Kitchen knife. An 8-inch chef’s knife is ideal. It should be a very sharp knife, both to slice easily through even hard vegetables, and to prevent injury.
- Wooden cutting board. Wood is an easier material to cut on than plastic. It’s much more stable, allowing for precise cuts.
- Vegetable peeler. You want need this for everything you cut, but some foods may require it.
Step-by-step Instructions
Please see the recipe card below for the full instructions, ingredient amounts, and a printable recipe.
Cut and trim the veggies.
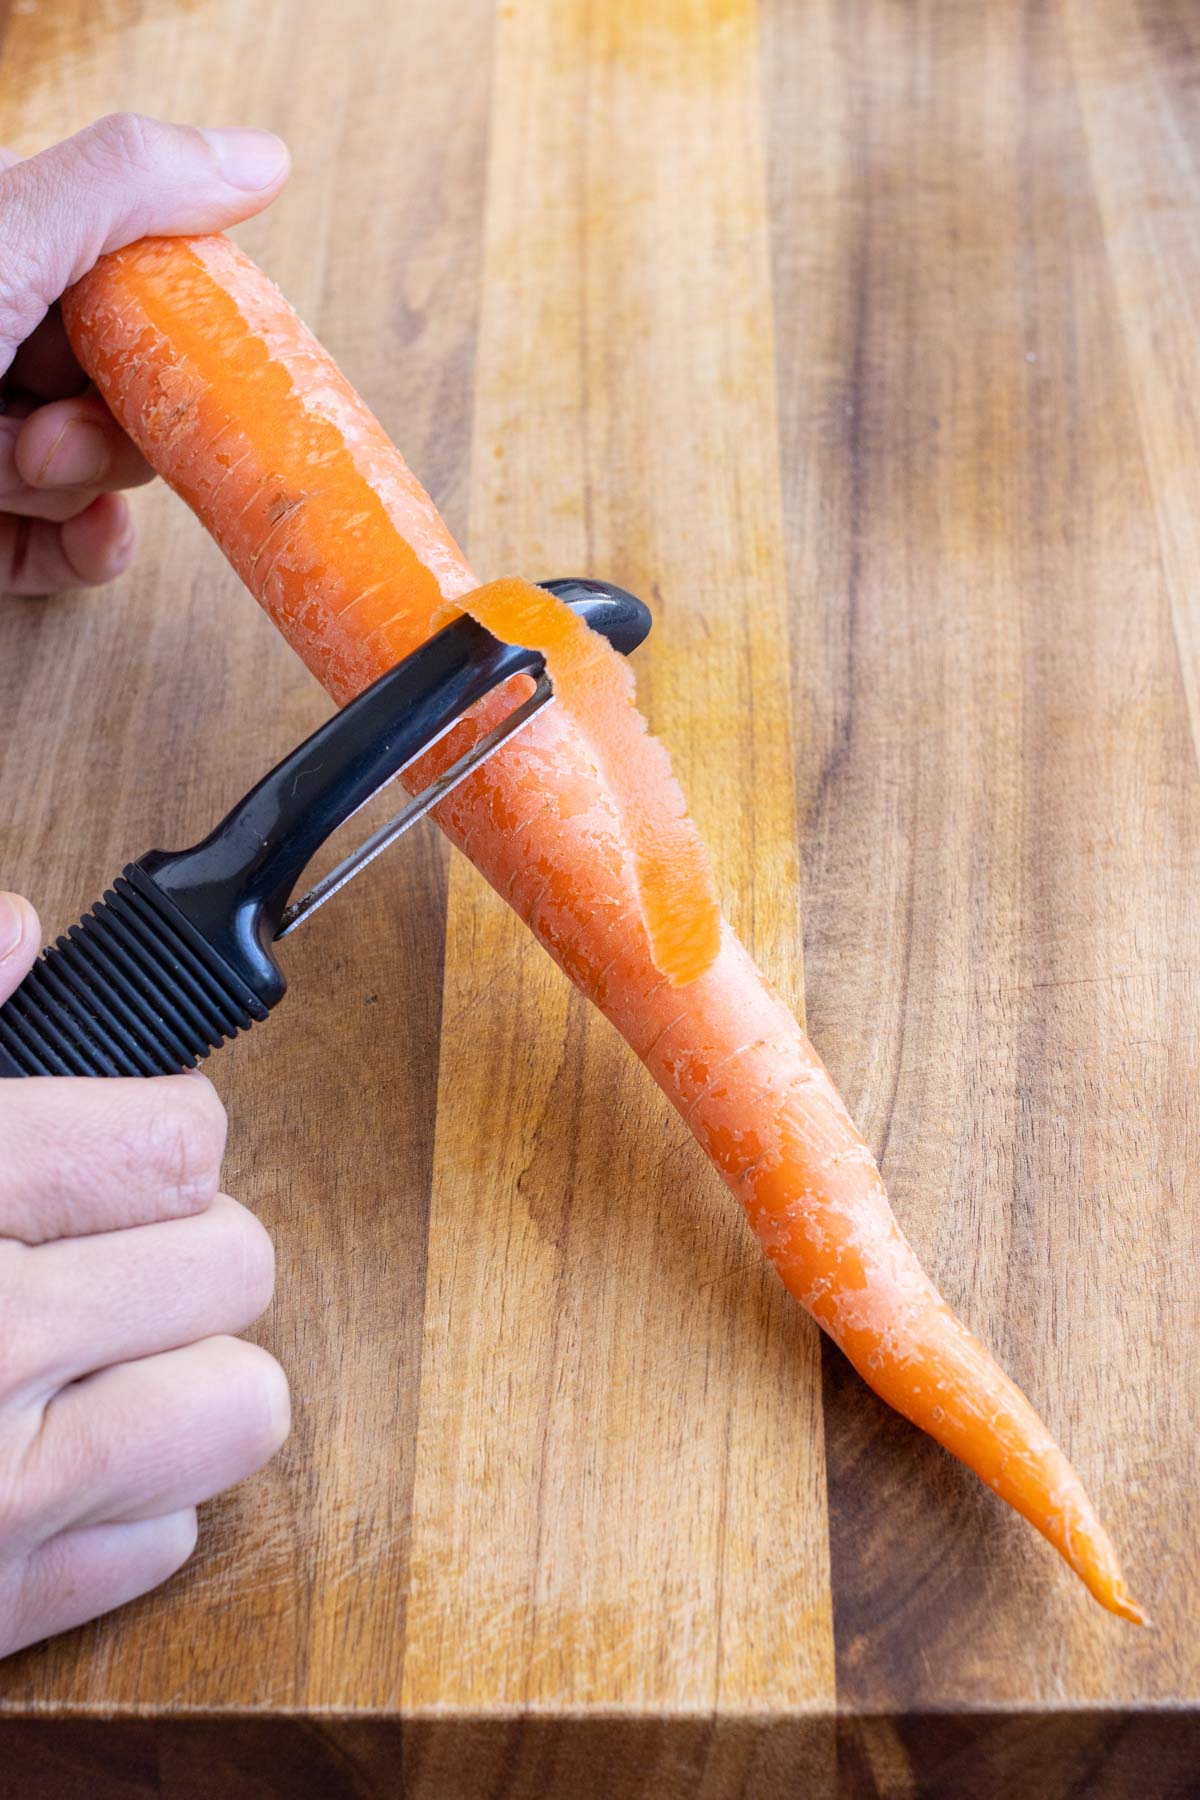
Wash the vegetables well to remove any dirt or residue. If you’re julienning something like a carrot or beet, peel off the outer layer first.
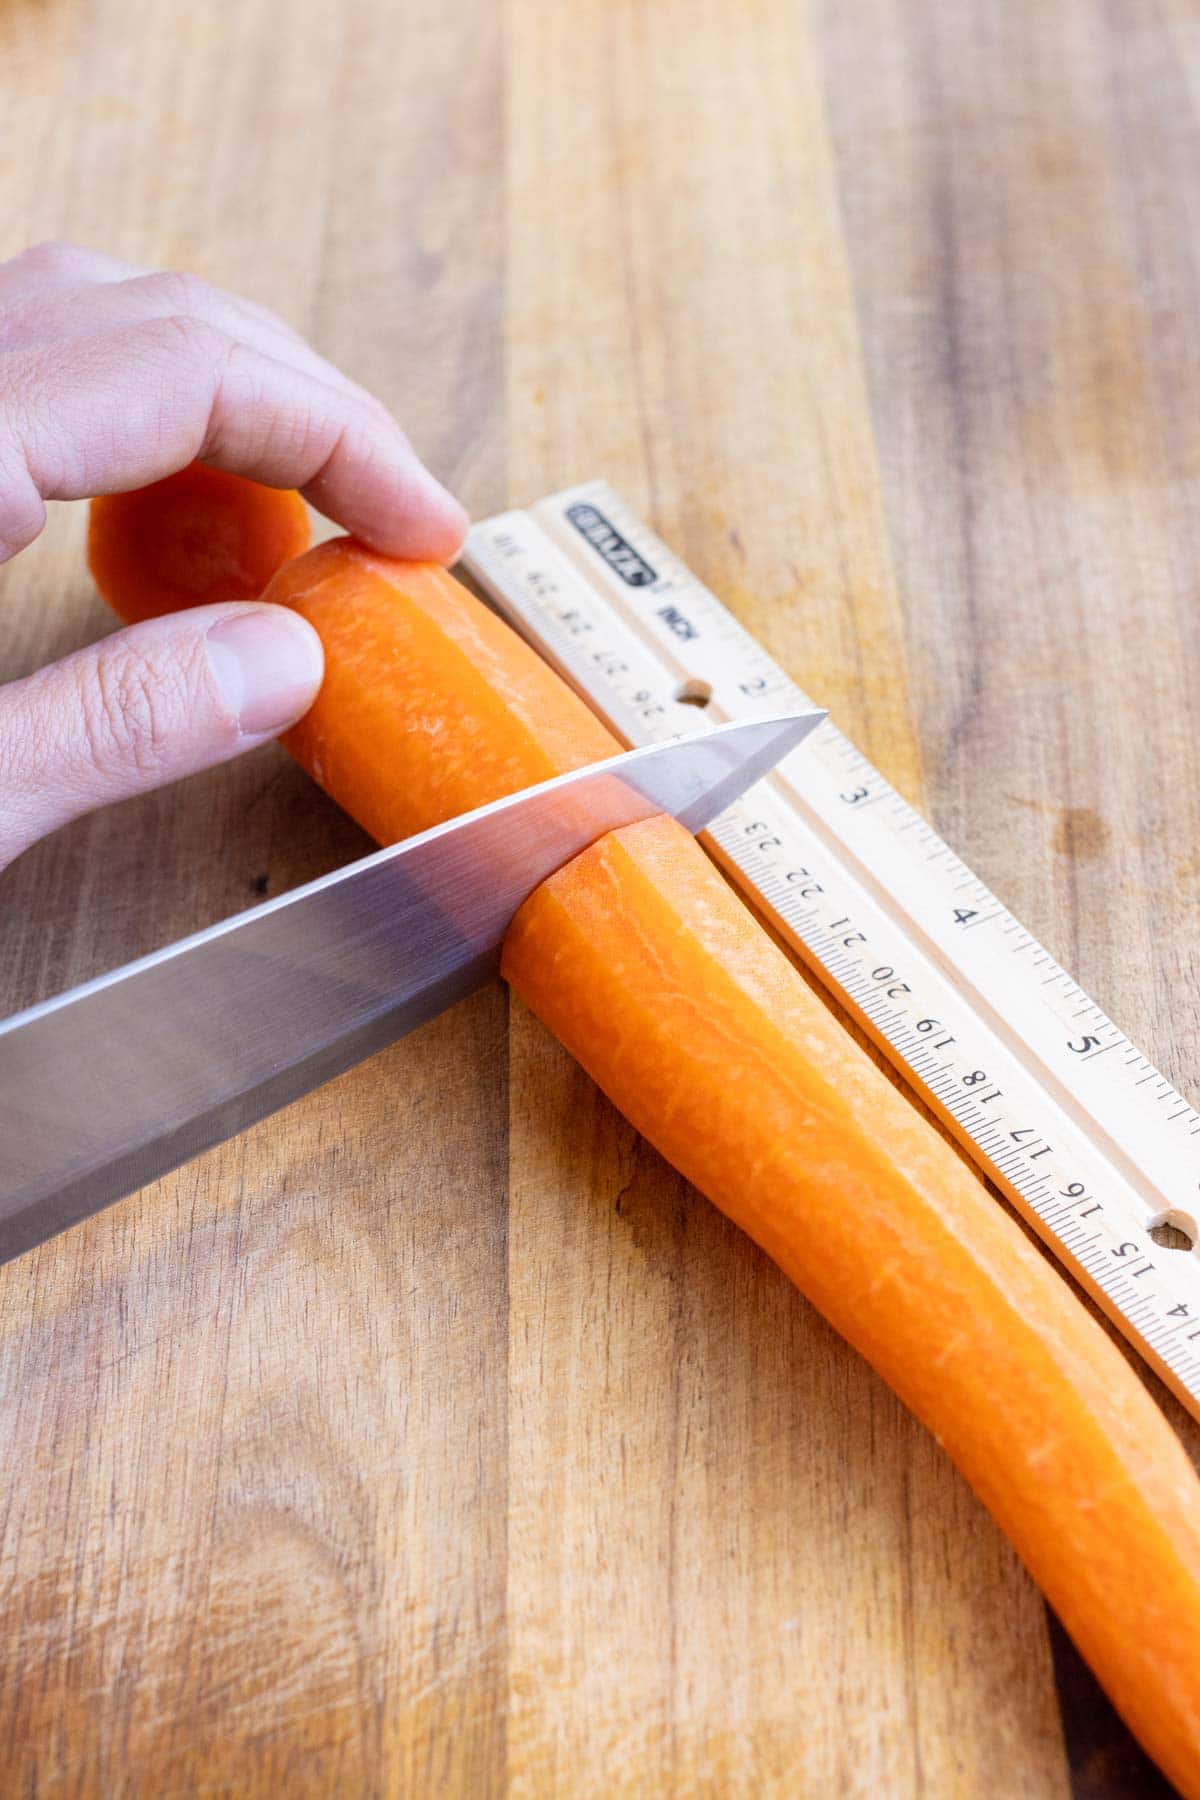
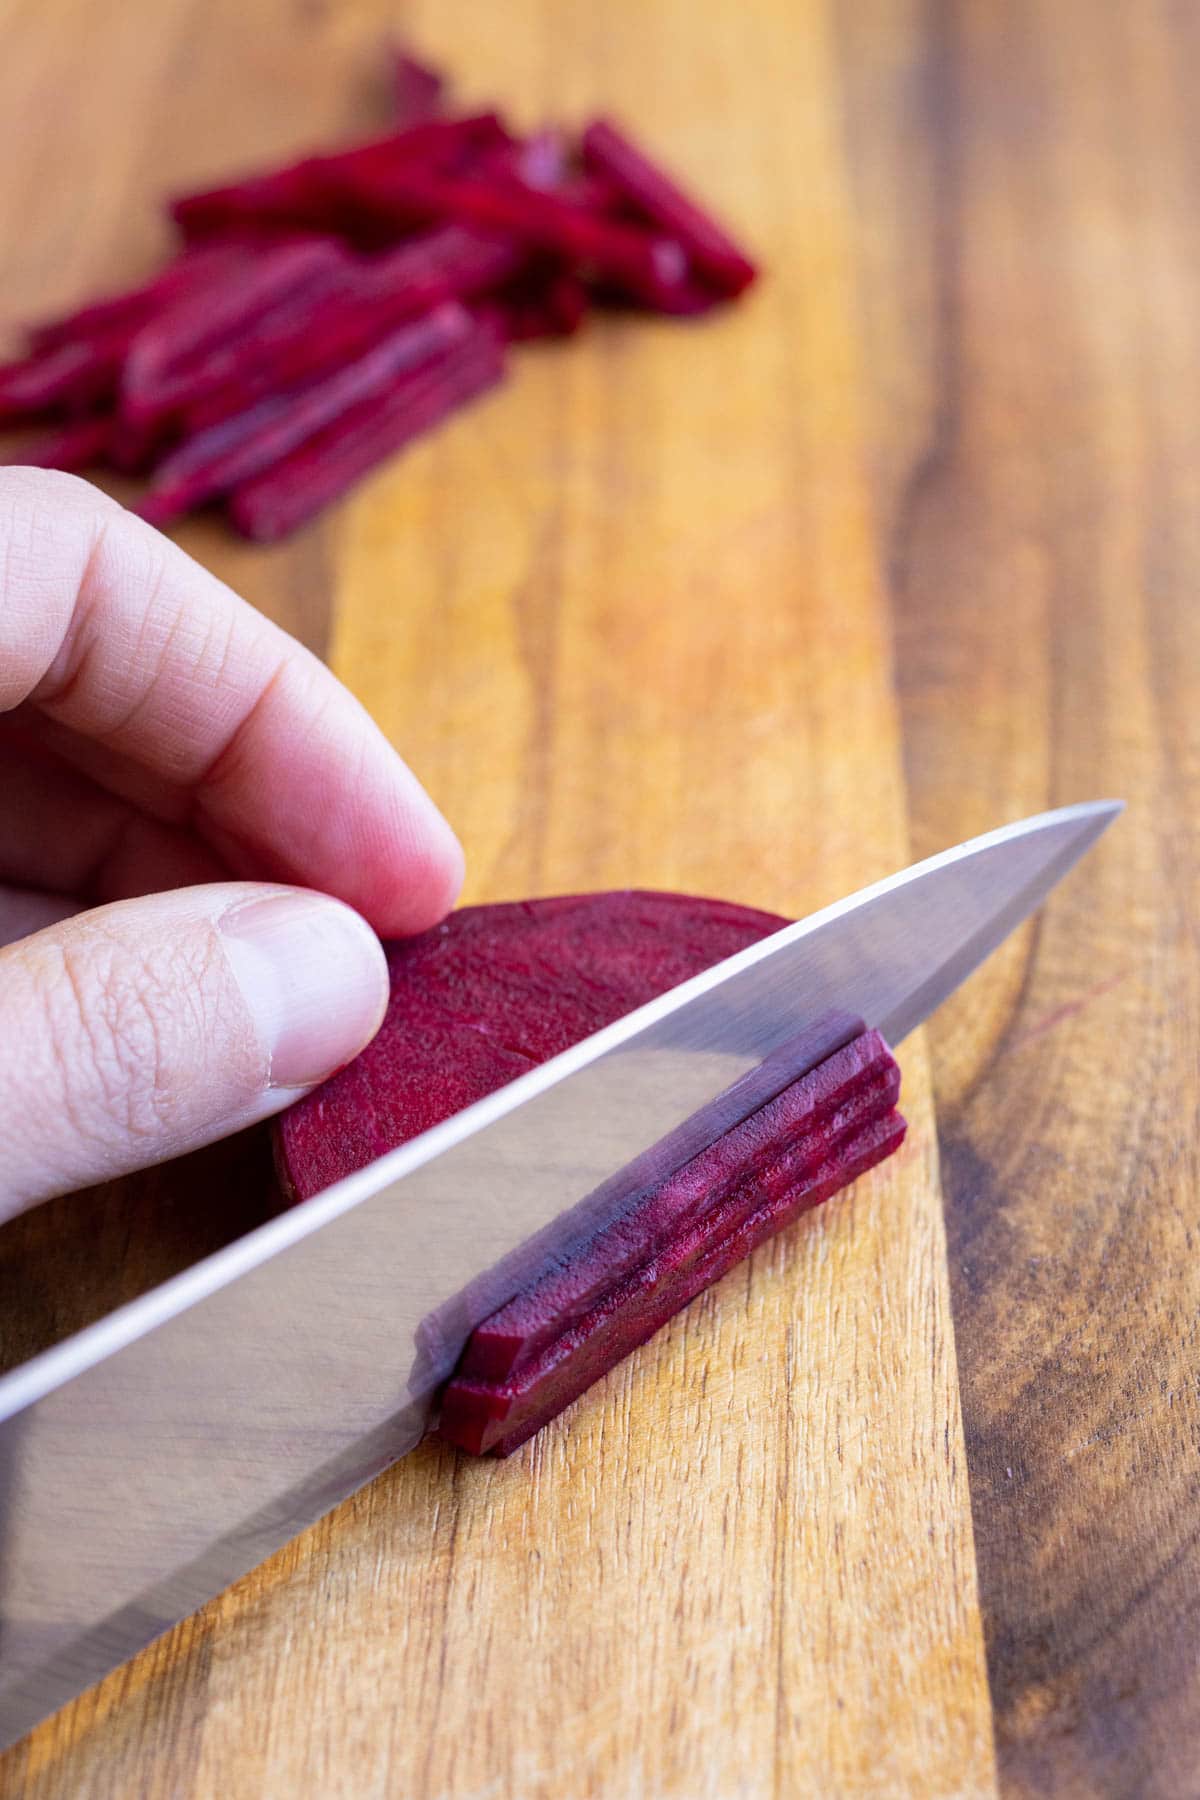
Trim the vegetable into 2–3-inch pieces, removing any stem or root ends. Place the pieces cut-side down and slice off a thin section from one rounded side to create a flat, stable base for cutting.
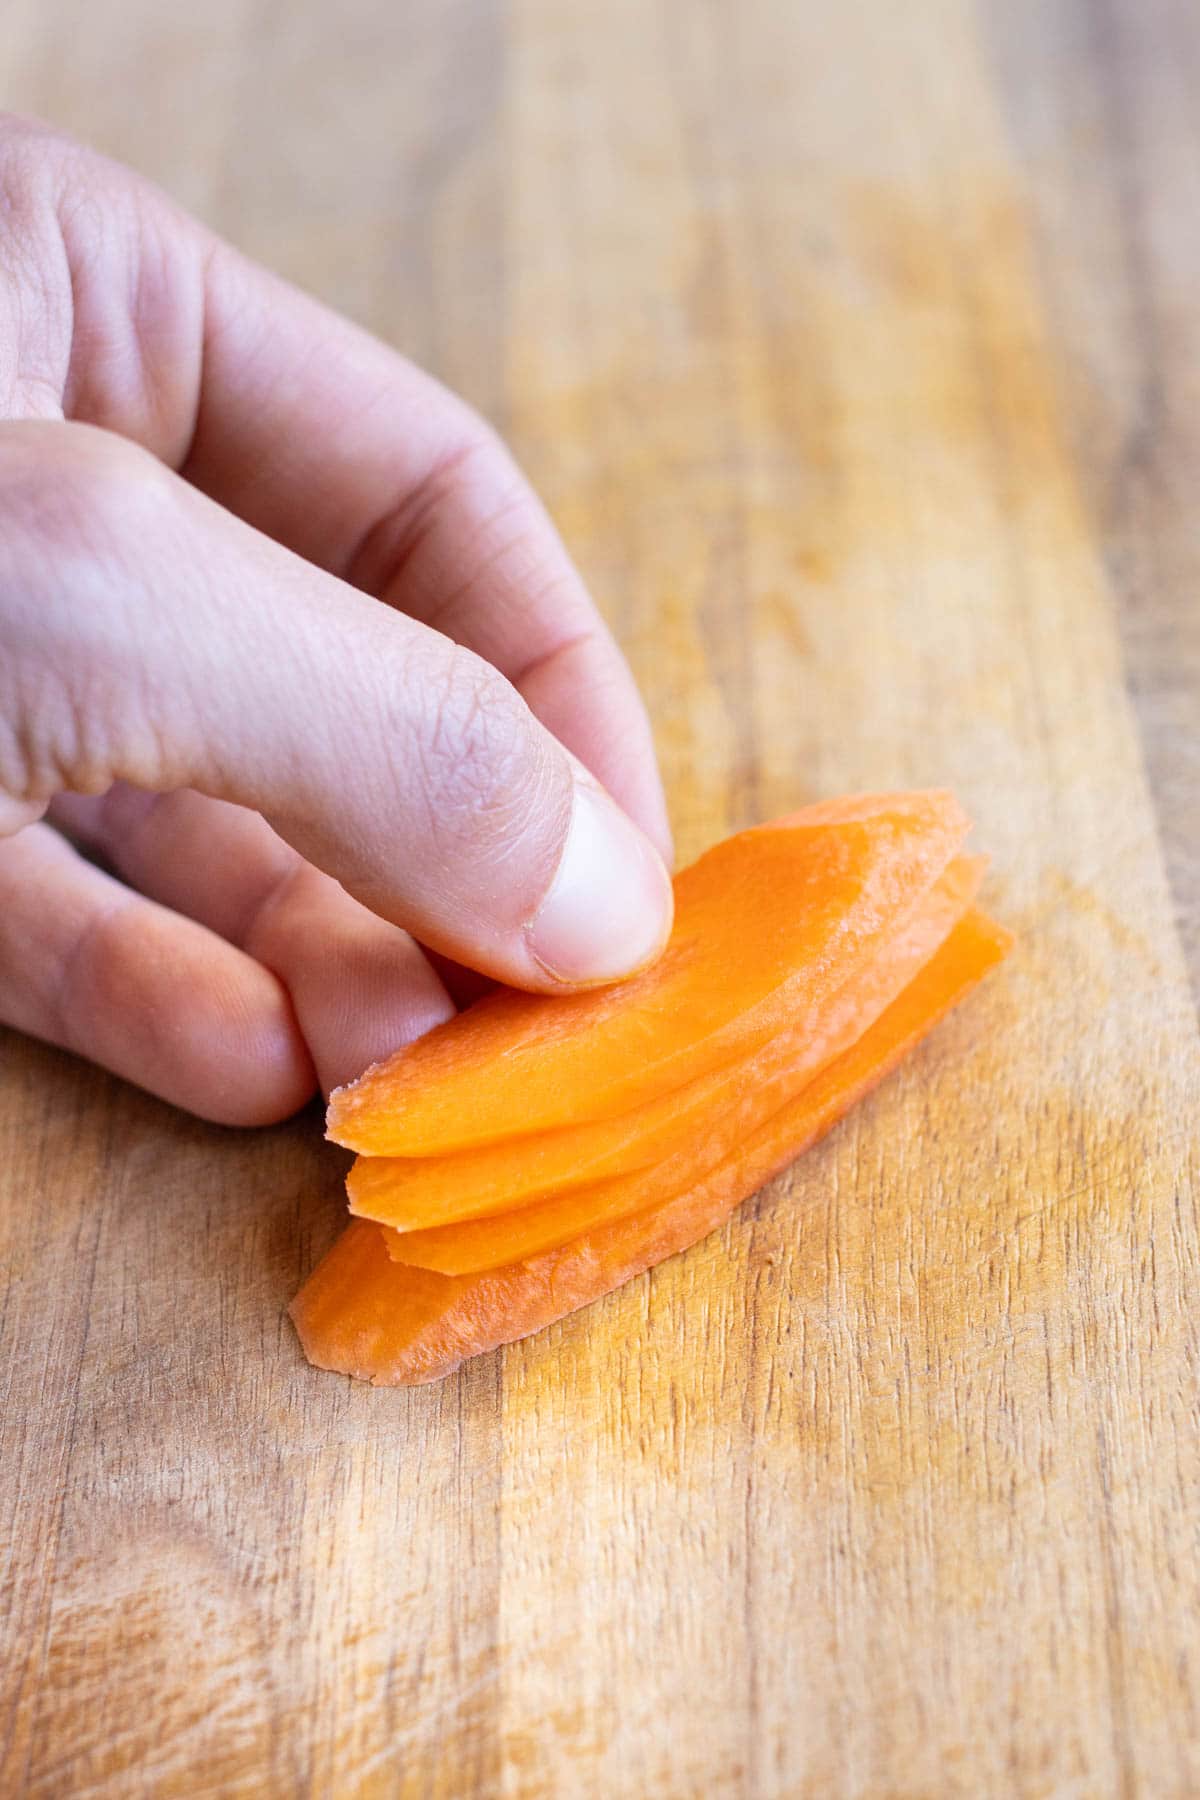
Planks and strips.
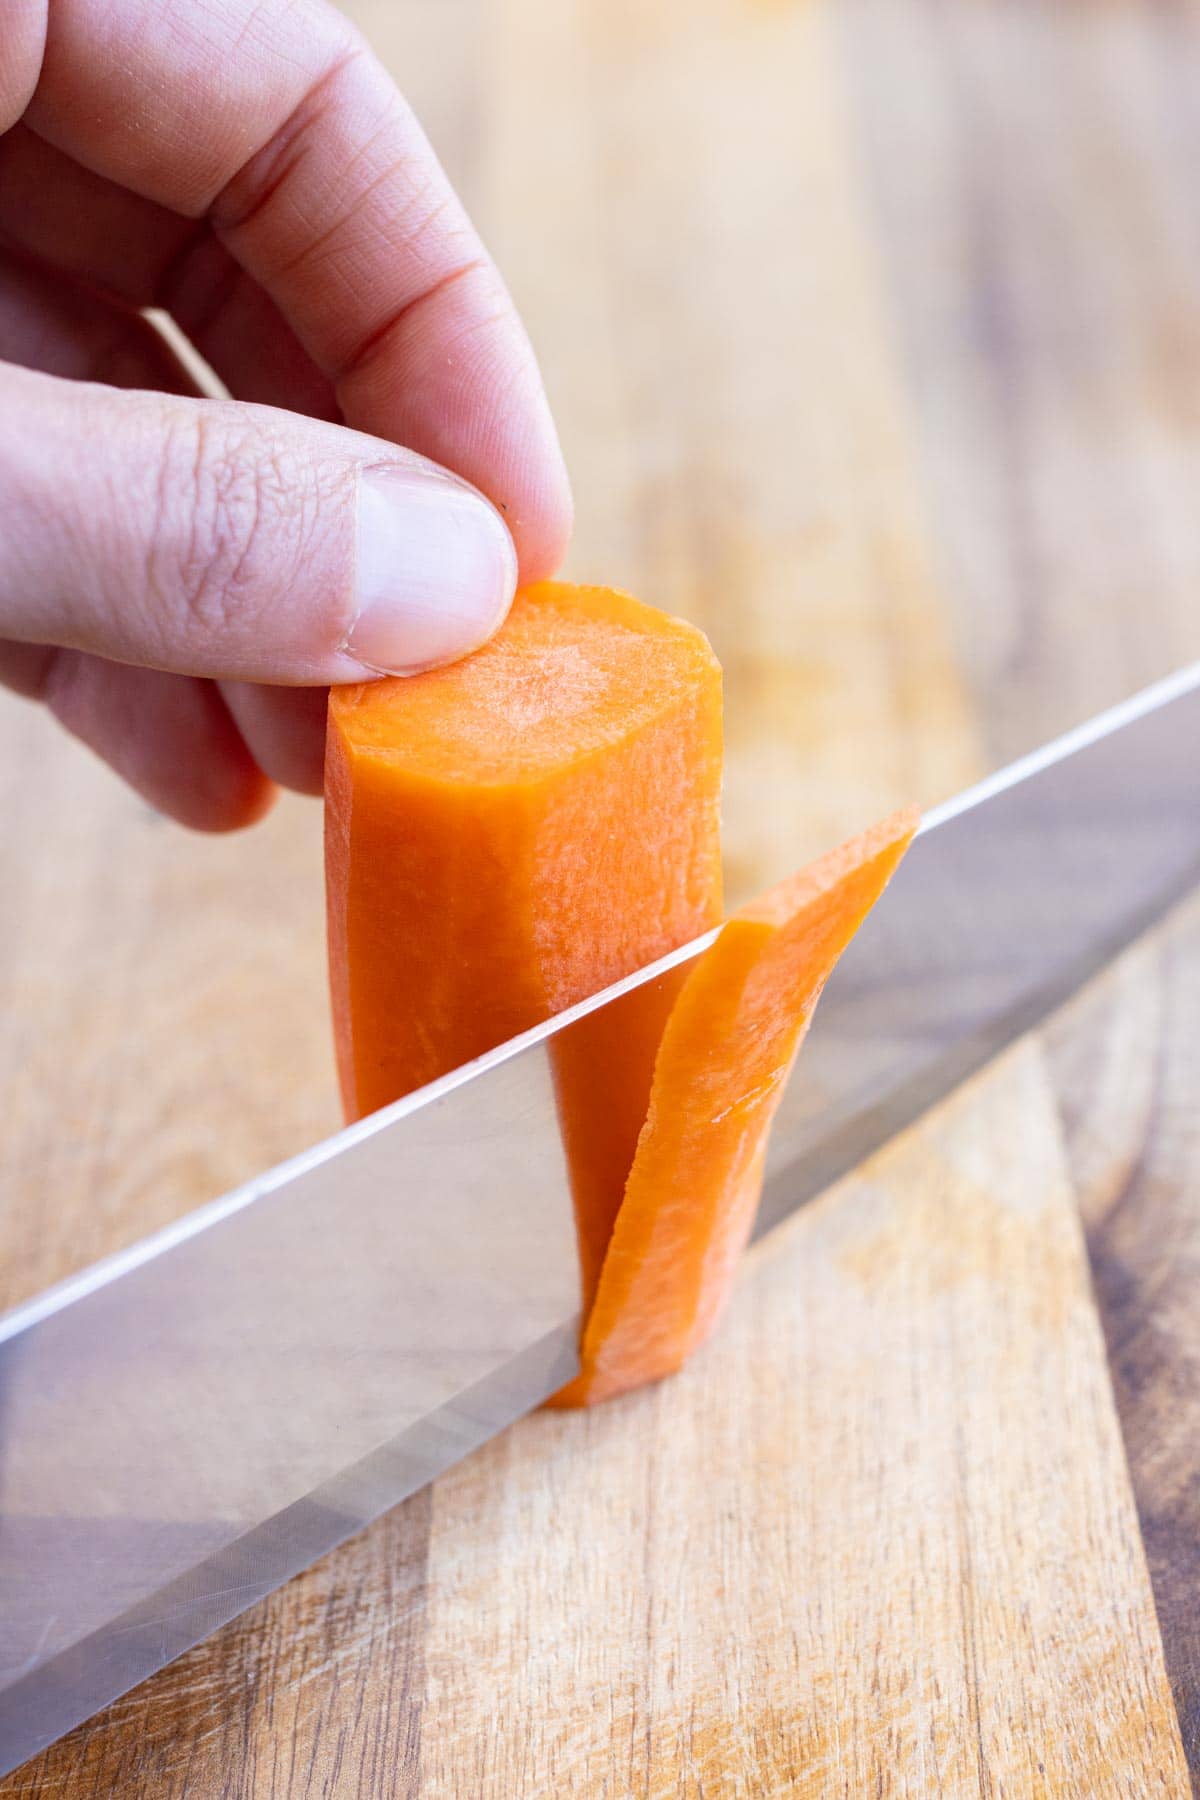
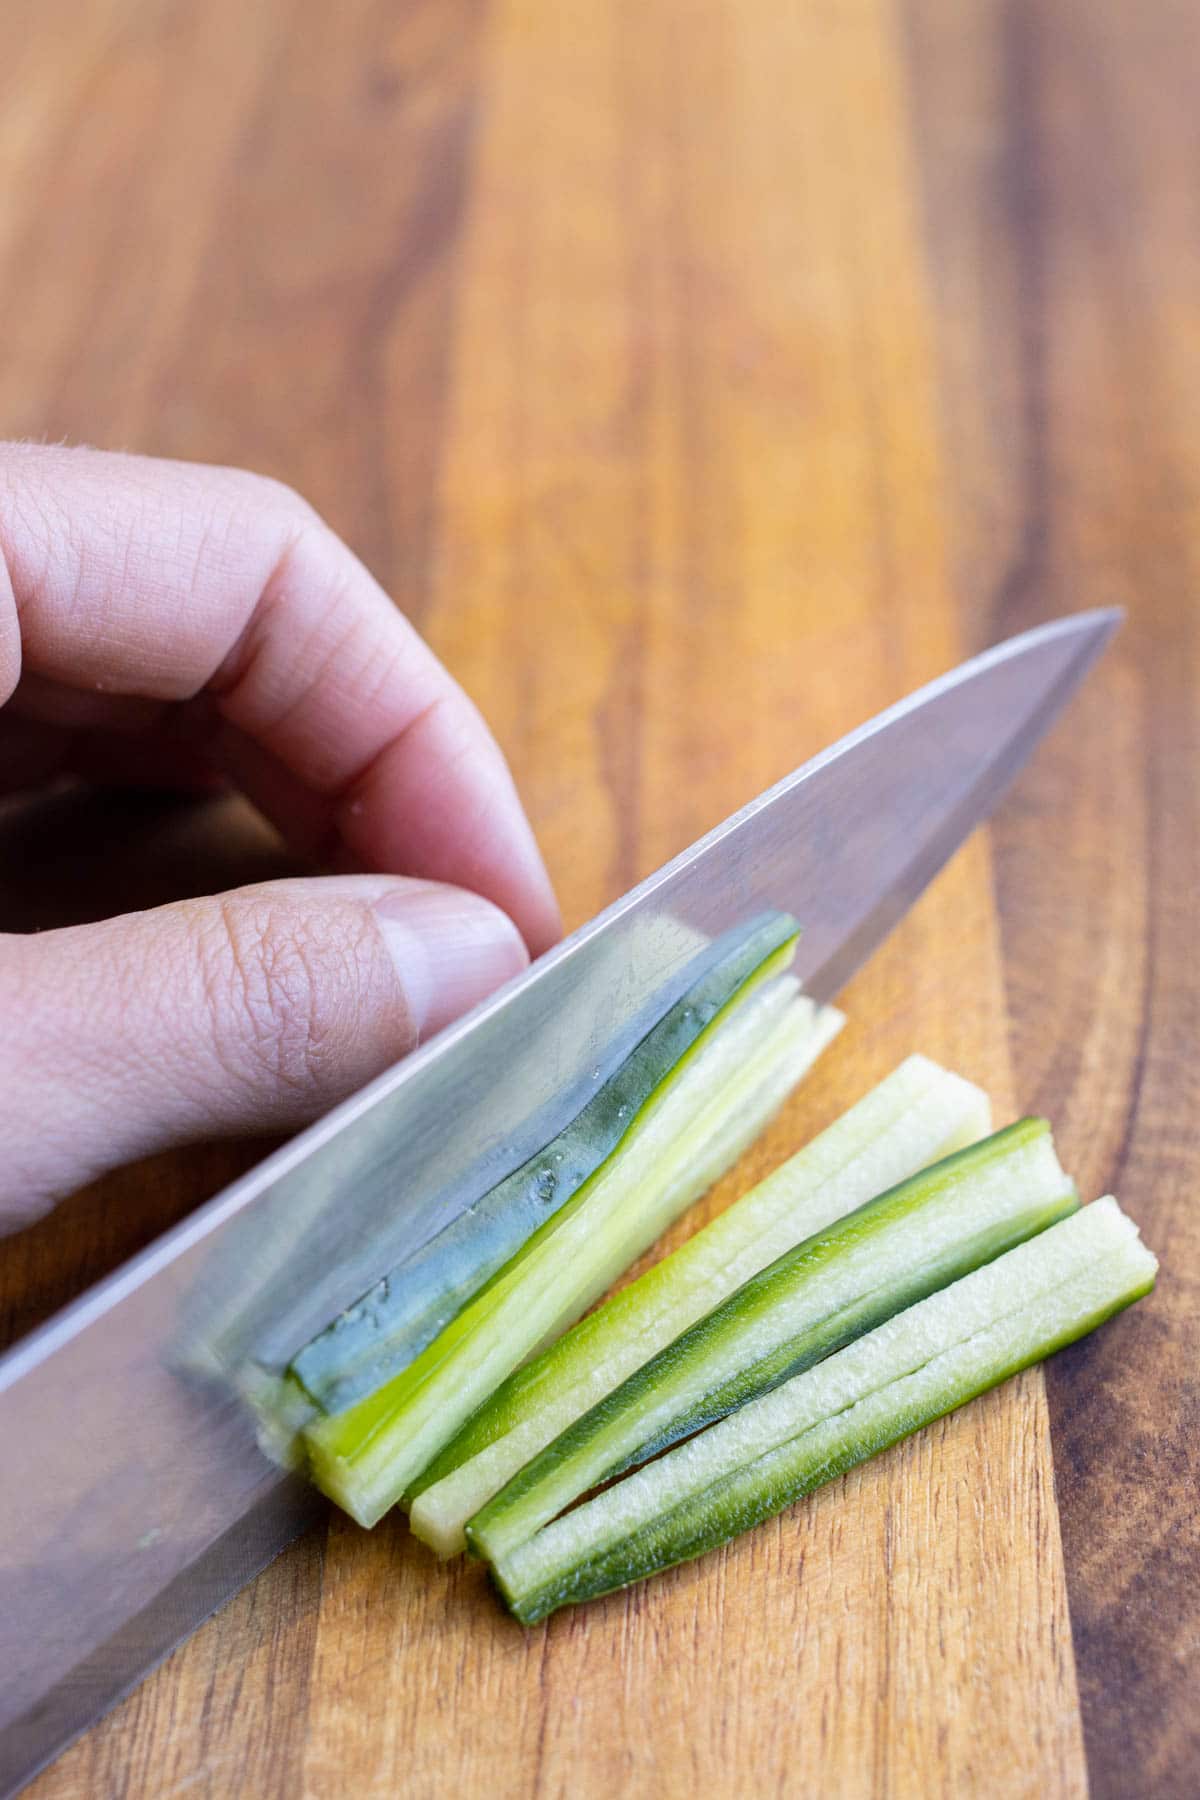
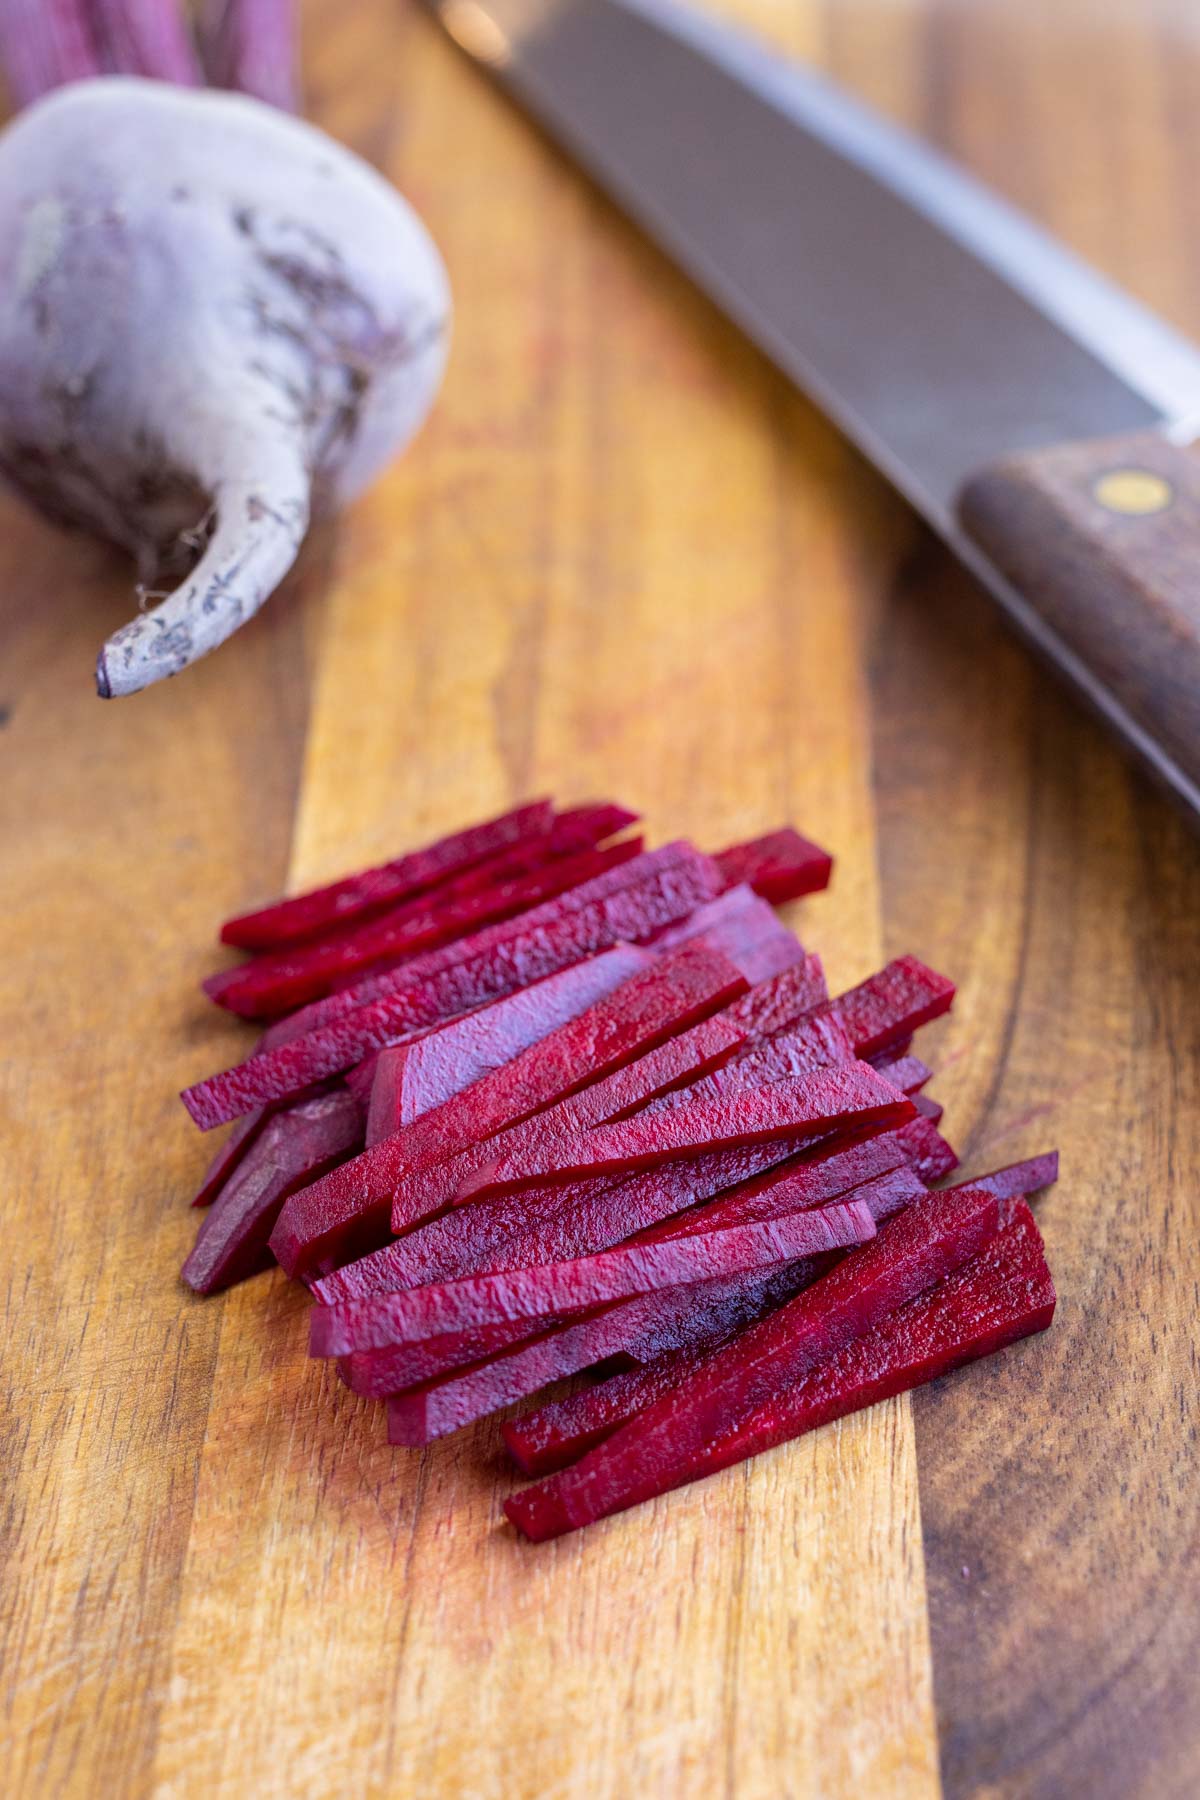
Place the trimmed piece flat side down and slice it into thin 1/16- to ⅛-inch planks. Take your time with this step, as it’s the most difficult part to get even.
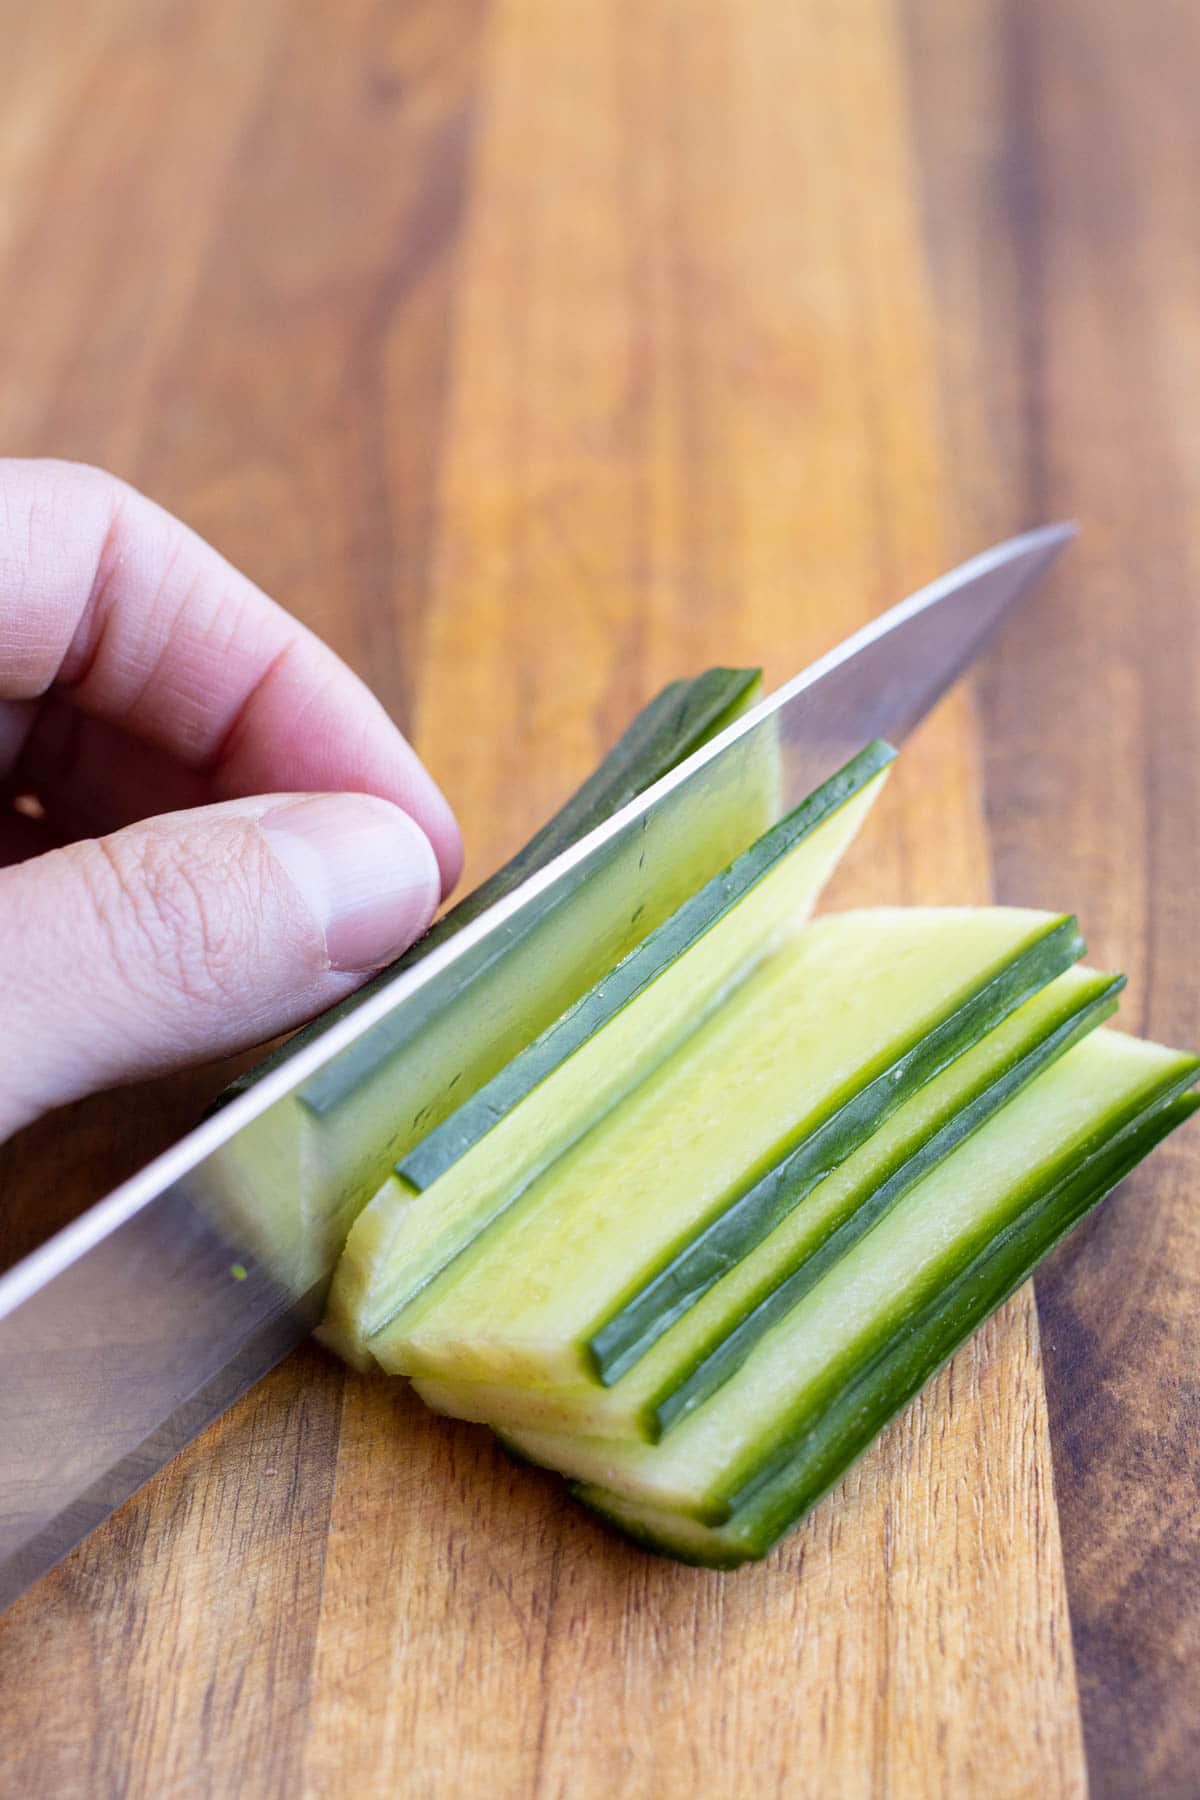
Stack a few of these slices together at a time, and lay them back on the board cut-side down. Cut them once more into 1/16- to ⅛-inch strips, creating a uniform matchstick shape.
Remember to cut the trimmed round edge you cut away earlier into strips so you don’t waste it.
Alternative method-Cut at a bias.
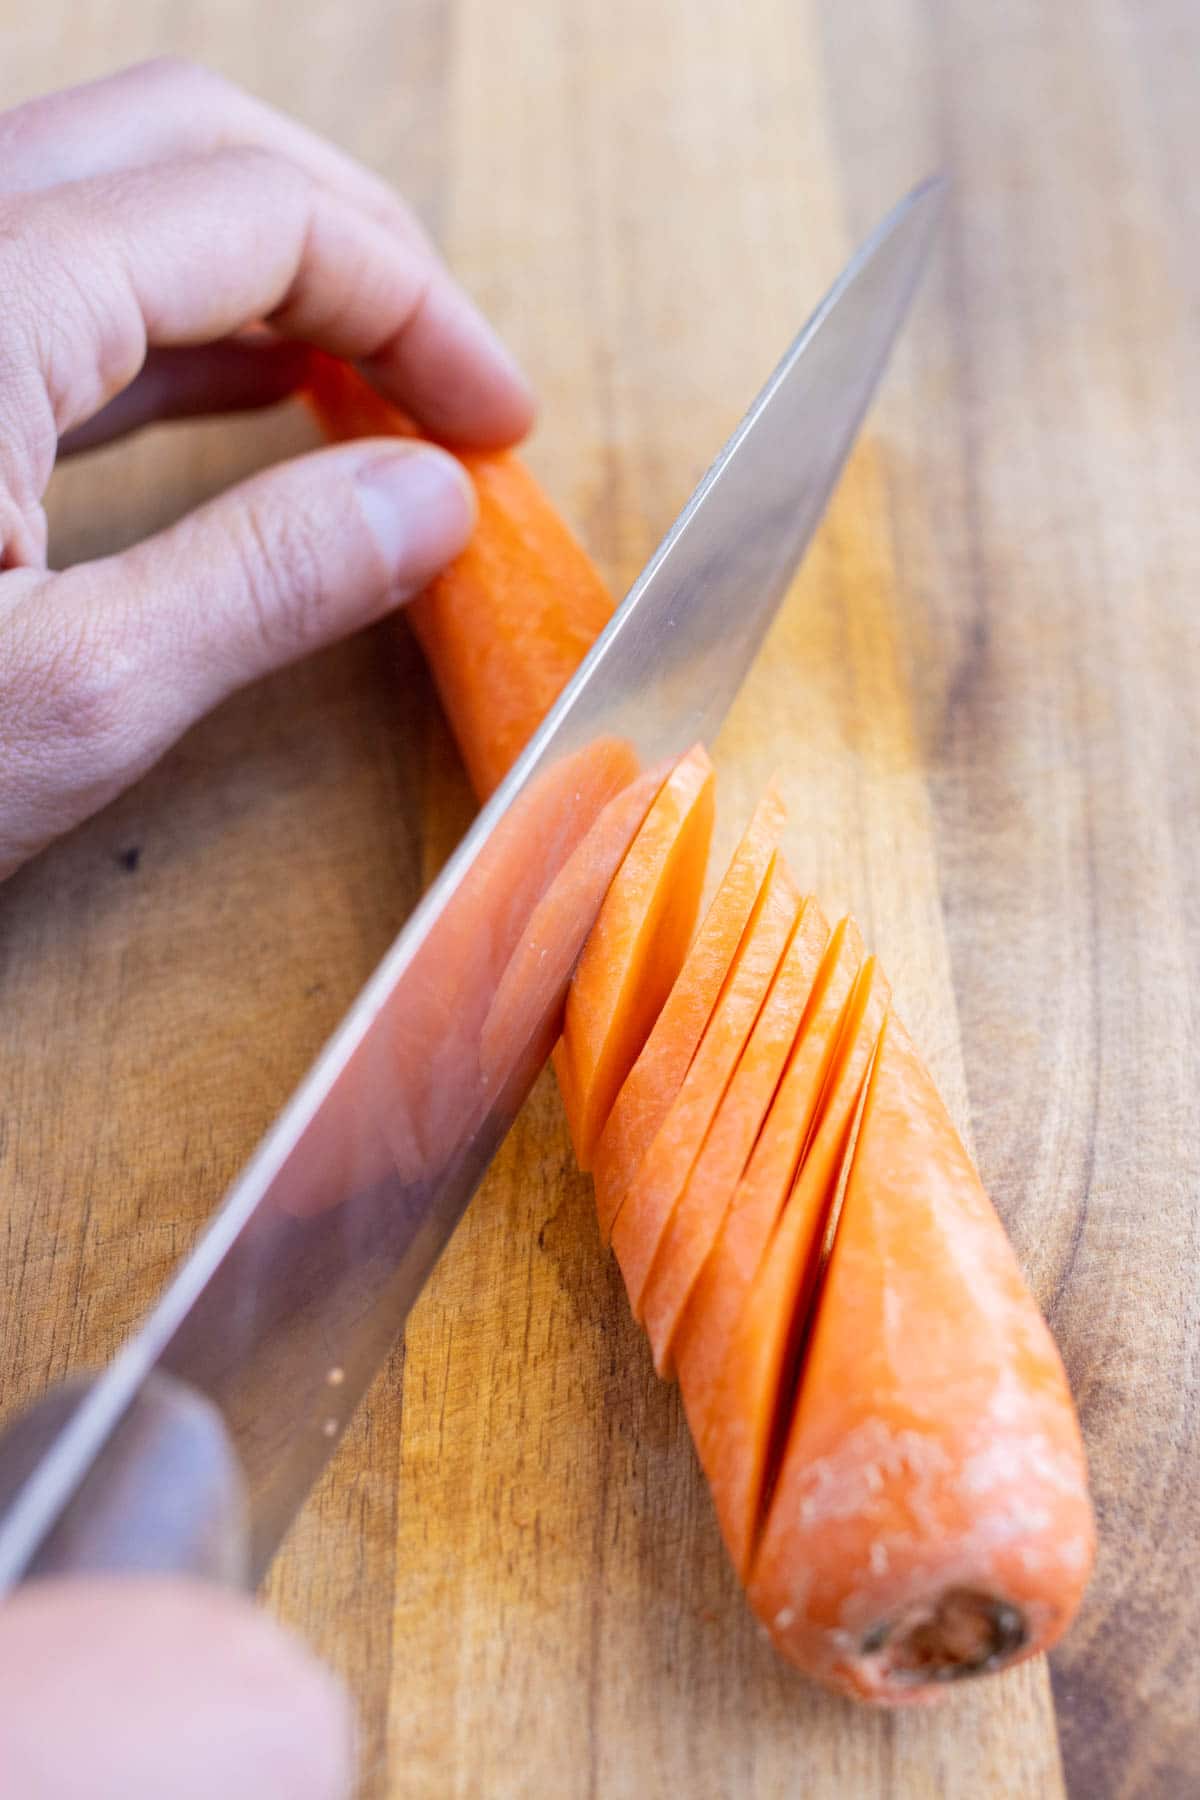
This method works best for cylindrically shaped vegetables, such as carrots or cucumbers.
Starting from the root or stem end, cut thin slabs at an extreme diagonal – or bias. These should also be roughly 2-3 inches in length.
Make these cuts 1/16- to ⅛-inch apart, making for rounded “planks” similar to those yielded by the traditional French method. While the curved shape of the slices makes for less uniform pieces, it makes this initial cut much easier.
Stack and slice.
Once again, stack a few of these “planks” together at a time. The final step is to carefully cut them again into 1/16- to ⅛-inch strips, creating a uniform matchstick effect. Enjoy!

FAQs
While “julienne” and “batonnet” both refer to long, rectangular vegetable cuts, batonnets are significantly thicker than juliennes. Batonnets usually measure in at about 2-3 inches long and ¼-½ inch wide in dimensions.
The phrase “julienne cut” refers to a specific style of vegetable preparation used in julienne soups, which feature the thin, matchstick-like cuts.
Brunoise cut uses julienned strips of vegetables as a base to dice small, almost perfectly uniform cubes. These are perfect for using in soups, salsas, and pot pies. Used on onions, celery, and carrots, you can also use this method to make a perfect mirepoix.
Julienne makes matchstick cuts of vegetables, but chiffonade refers to a similar, basic knife technique used to make thin strip cuts out of herbs or other leaves, such as basil. This can be especially helpful when shredding herbs of delicate texture for things like slaws or pasta salads.
What to use it with?
Julienne-cut vegetables are extremely versatile, and can be used in a wide variety of dishes in addition to the ones listed above. Give some of these recipes a try with your fresh-cut julienne vegetables:
Tap stars to rate!
How to Cut Julienne Strips
email this recipe!
Ingredients
- 1 vegetable carrot, cucumber, beet, squash, etc.
Instructions
- If julienning a carrot or beet, first peel the outer layer using a vegetable peeler.1 vegetable
Classic French Method:
- Cut the vegetable into 2 to 3-inch pieces, discarding any root or stem ends.
- Place the piece cut-side down on a cutting board and trim a thin slice off of the rounded side to square it off and make a stable base.
- Place the piece flat-side down and slice into thin 1/16- to ⅛-inch planks. Stack a few of these slices together and cut again into 1/16- to ⅛-inch strips. And that piece you trimmed at the beginning – don't forget to cut that into strips, too!
Alternative Method:
- Starting from the root or stem end of a cylindrically shaped vegetable, cut at an extreme diagonal, or bias, that is 2-3 inches in length. Continue making these cuts 1/16- to ⅛-inch apart.
- Stack a few of these pieces on top of each other and cut again into 1/16- to ⅛-inch strips.
Tap stars to rate!
Video
Notes
- Peeler: Alternatively, you can use a julienne peeler , but do note that the strips will be pretty thin and small.
- Veggies: Fresh, firm produce for julienne makes chopping much easier than older vegetables.
- Tools: If particularly short on time, you can also use a mandolin to quickly cut the vegetables on a bias.
- Cleaning: Even for vegetables getting peeled, washing before preparation can eliminate the risk of harmful dirt or bacteria in your food.
Nutrition
Nutrition information is automatically calculated, so should only be used as an approximation.
More Knife Technique Tutorials
A julienne cut is just one of the many versatile ways to use a knife in the kitchen. By learning more of these techniques, you can be cooking like a professional chef in no time: